Even though our WordPress themes include almost 1,000 free Google Fonts, there might be occasions where you'd like to use a custom font from another source. If you'd like to install a custom font in your pipdig theme, follow the steps below.
1. Create a WOFF file
In order to use a font on a website, you will need to install a webfont file known as WOFF. If you have purchased the new font as a webfont, this will already include the WOFF file which you need. If you have downloaded a font in OTF or TTF file format, you will first need to convert this to a WOFF. You can use free websites such as transfonter.org to create the WOFF file which you need.
When you have the WOFF file, save it to your desktop.
Please note that you should have legal permission to use any custom fonts under their respective licenses.
2. Install the "pipdig Custom Fonts" plugin
The next step is to install the pipdig Custom Fonts plugin on your site. Follow the steps below to do this:
2.1 Download the plugin by right-clicking this link (or cmd-clicking on Mac). Then select “Save linked file as…”. Please note that the wording may be slightly different depending on which web browser you are using. Save the file to your desktop.

Now that the file has been downloaded to your computer, we can now upload this to your WordPress site.
2.2. Access your WordPress dashboard. Go to the Plugins > Add New page.

2.3. Click the Upload Plugin button at the top of the page. Then click the "Browse" button. This will allow you to select the 'shopr.zip' file you downloaded during the steps above.

2.4. Now activate the plugin:

3. Upload the font to your site
Noww that the pipdig Custom Fonts plugin is installed and active, we can use the new options to upload the WOFF file.
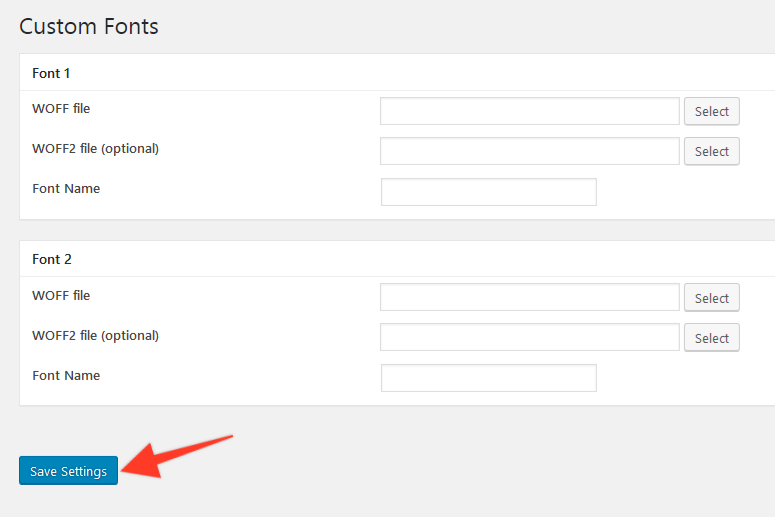
3.1 Go to pipdig > Custom Fonts in your dashboard:

3.2 Upload the WOFF file from your desktop using this option:

You can also upload a WOFF2 file if your font comes with one. However it is not required. It will help to speed up the font loading time very slightly though.
3.3 Give your custom font a name. This name will be used in the theme options screen so that you can select it from the list of fonts available.

You can also upload any other fonts at the same time.
3.4 Click Save:

Your custom font will now be available via the font options in your theme. Any custom fonts will be displayed at the end of the list of fonts like this:

In the example above, we created a custom font and called it "pipdiglet". It is now available to select from any of the font options in the theme.