You can use use Post Categories to group posts together and then display them on a page/menu item on your site.
Let's take an example of adding a blog post to a "Fashion" category:
Step 1 - Add your posts to the "Fashion" category
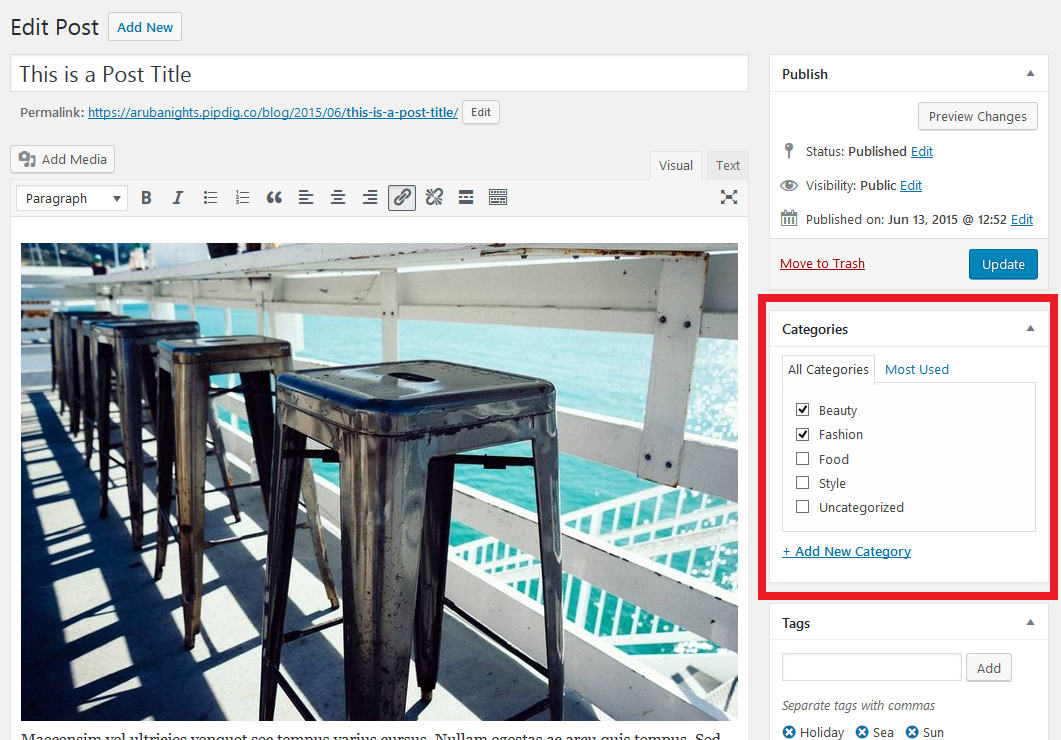
When editing the blog post, add your desired categories using the box on the right side of the screen:

In our example, we would check the box that says "Fashion". If you have not yet created the category, you can do this from the same box.
You can now update/publish the blog post to save the changes.
Step 2 - Add the category to the menu/navbar
This section assumes that you have already created a Primary menu via this guide.
Now that we have a published blog post within the "Fashion" category, we can add this category to the menu.
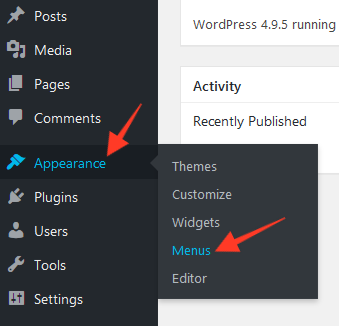
Go to the Appearance > Menu page in your dashboard:

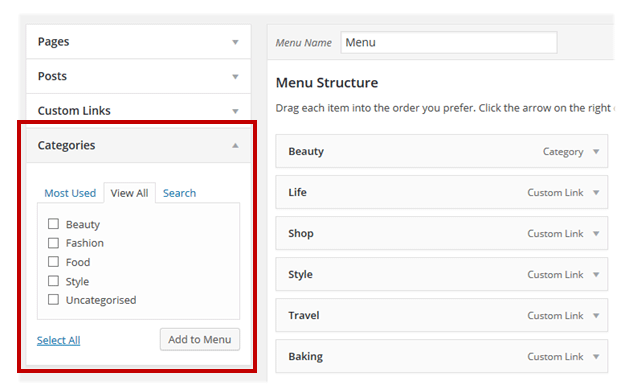
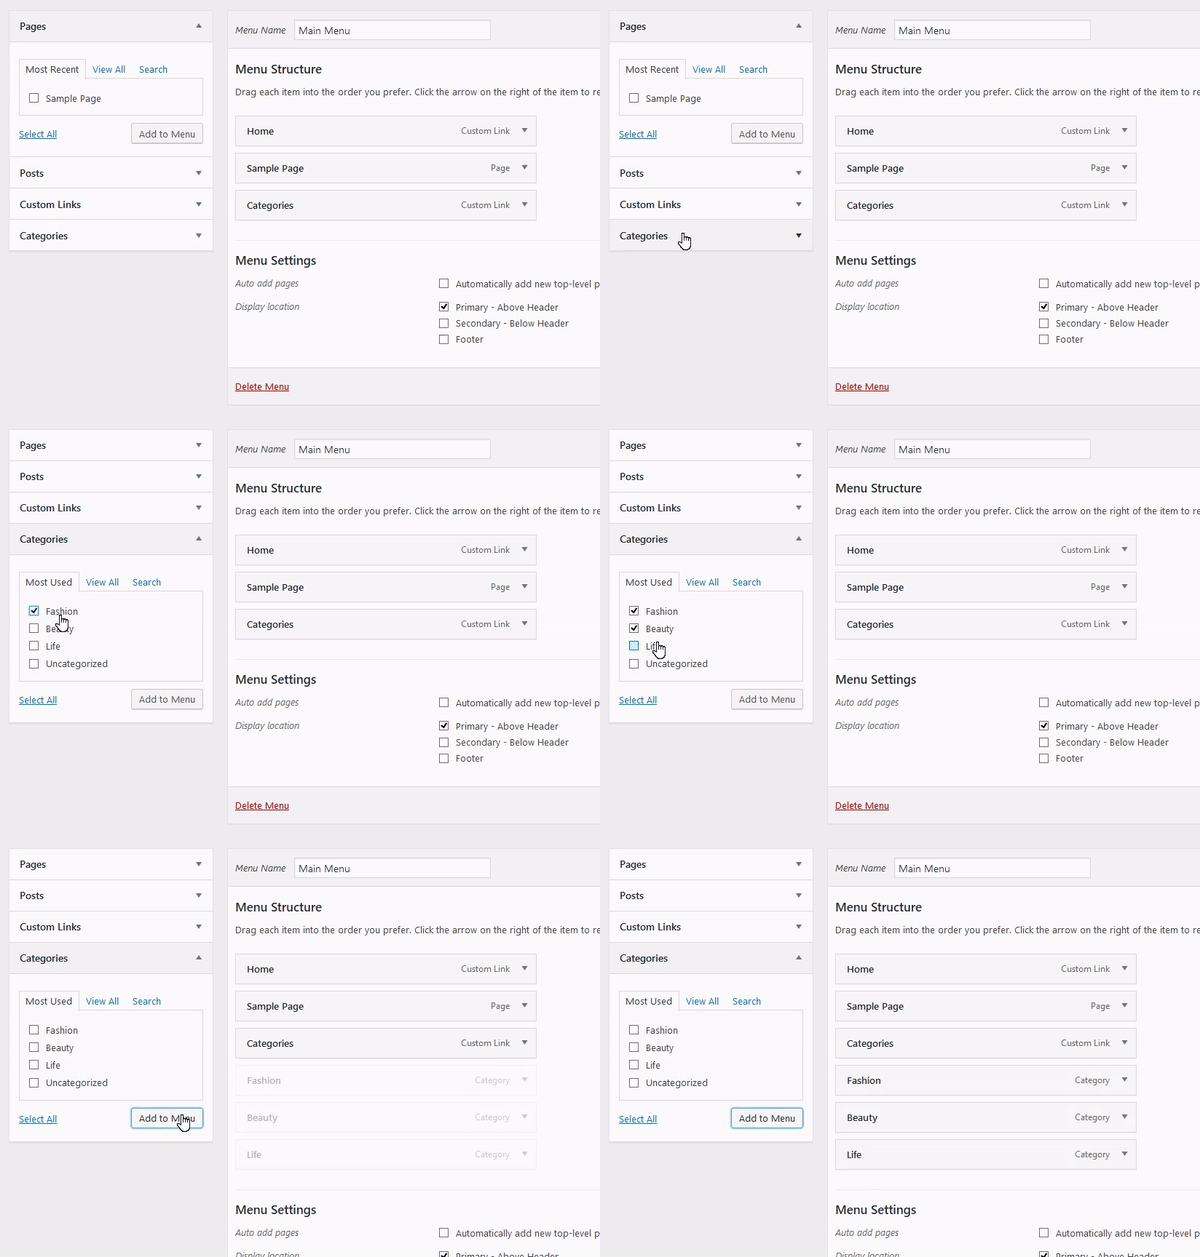
Click the "Categories" tab on the left side:

You can now select any post categories to add to your menu:

Please note that a category will only show in this list if there is at least one blog post published in that category. If you have not yet published any posts, no categories will appear as available. So you may wish to publish some blog posts first before creating the menu.
You can now save the menu and the categories will appear on your site.
Article tags: post categories, categorize, categorise, posts, dropdown