If you're new to Google Adsense, you may wish to start with this guide before following the guidance below.
In this guide, will look at how to insert Google Adsense ads in blog posts/pages automatically. We will also look at how to insert ads into the article content in specific locations. For example, after a section or text or an image.
Automatically display Adsense ads at the start/end of post content
Using theme hooks, it is possble to display Google Adsense ads in various locations on your site. In this guide, we will show you how to display ads at the start or end of blog post content.
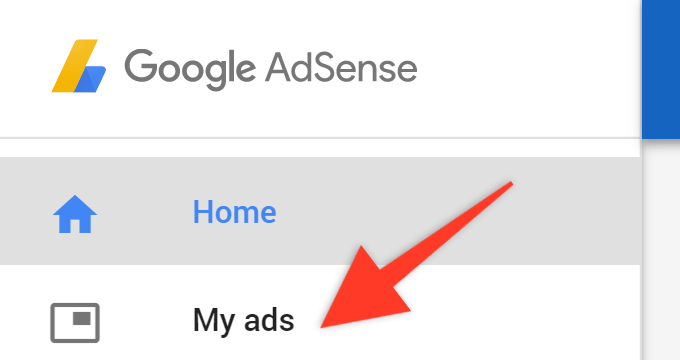
1. Go to your Google Adsense account and click on the "My Ads" button:
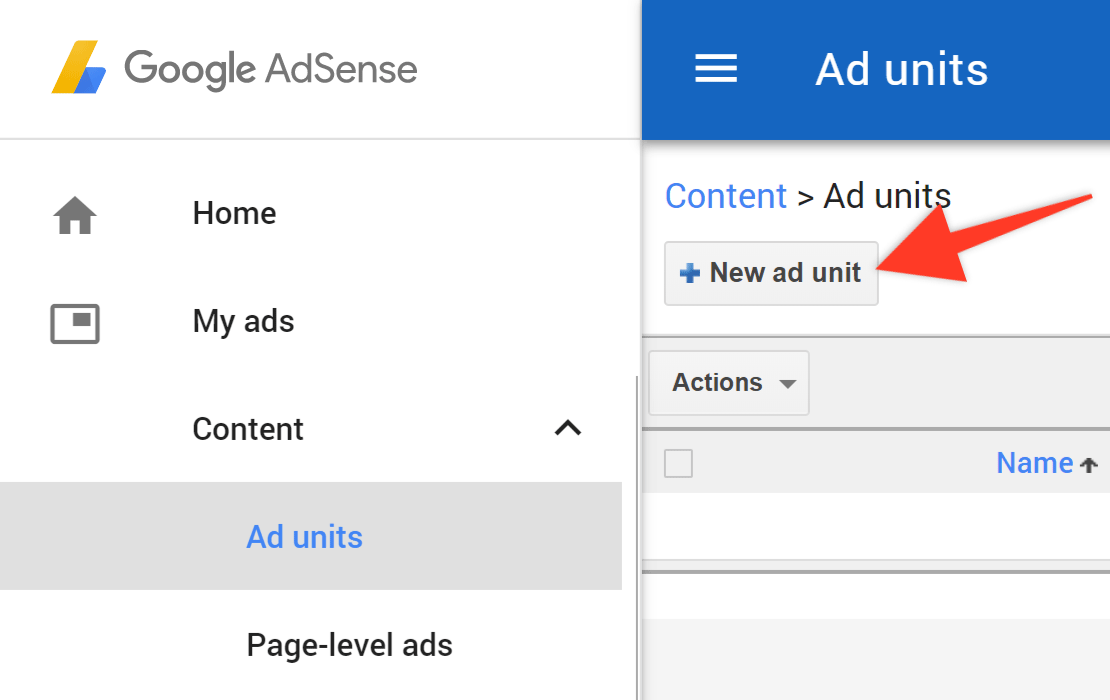
2. Here you can access all of your ads. If you have not yet created one, click the "New ad unit" button:
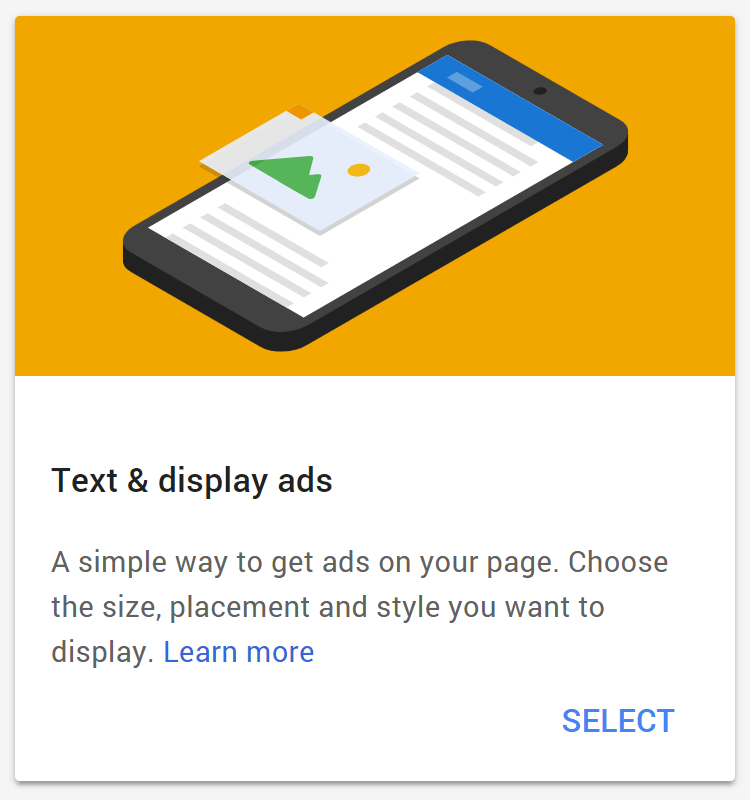
3. Select "Text & display ads" from the options:
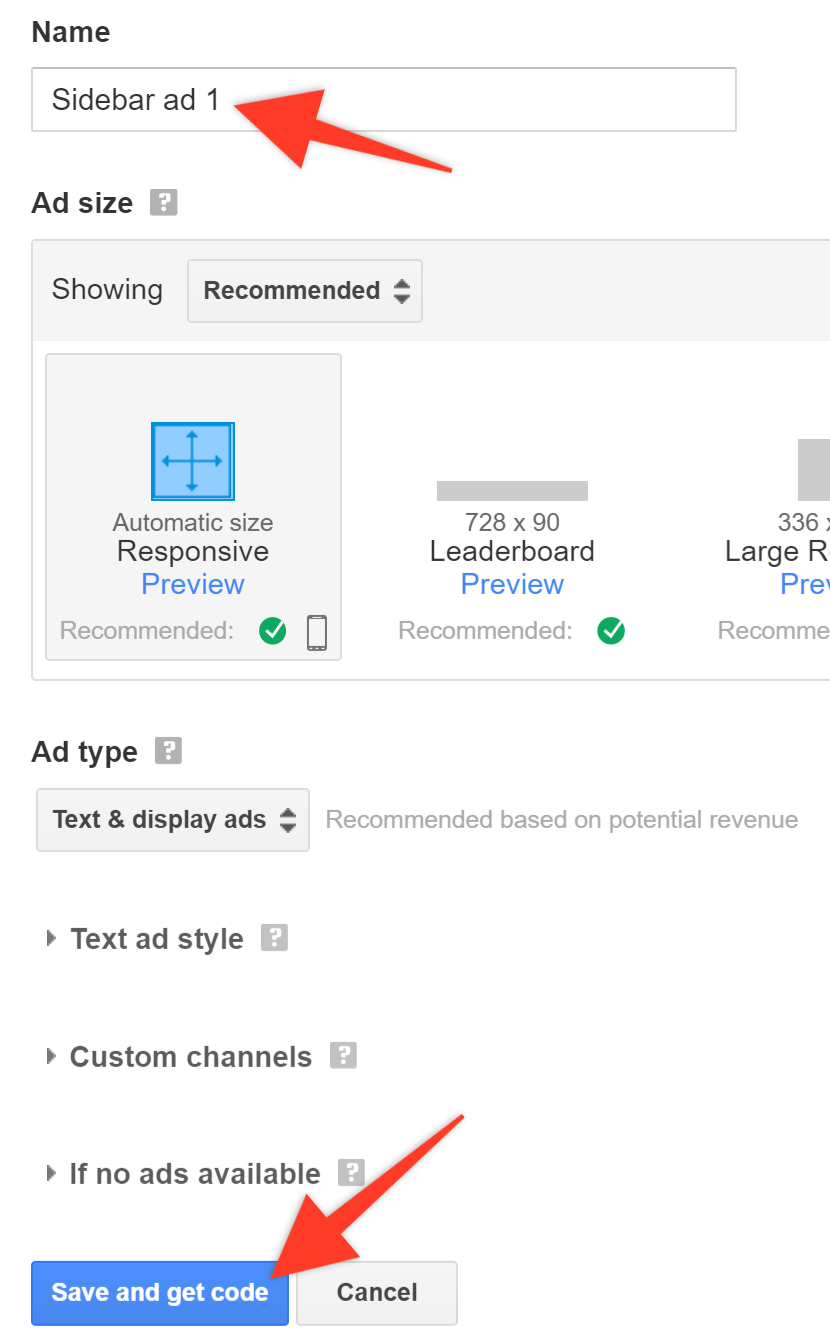
4. We recommend that you leave all of the options as defaults for best results. Simply enter a name at the top and click the "Save and get code" button:
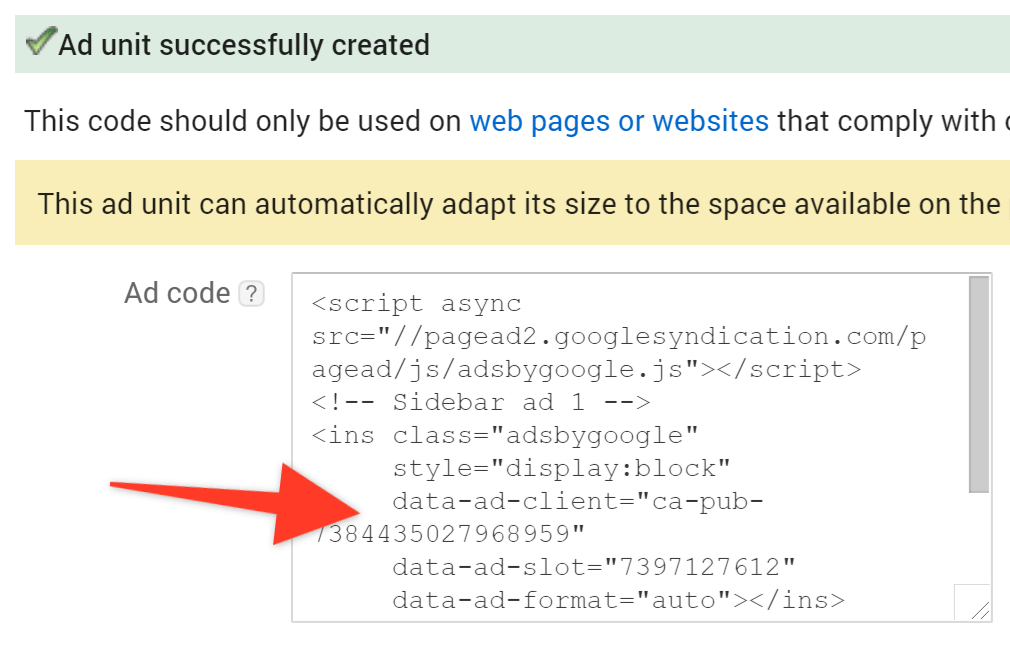
5. Copy the code provided:
6. Go to the "pipdig > Theme Hooks" section of your WordPress dashboard:

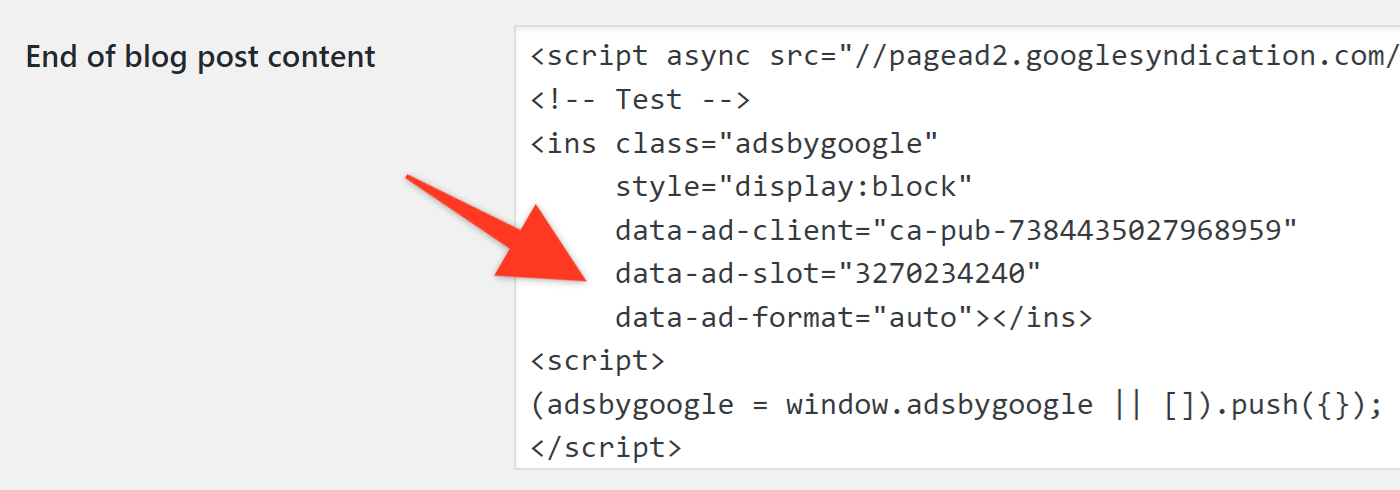
7. Paste the code into the "End of blog post content" or "Beginning of blog post content" box, depending on where you would like the ads to be displayed.
For example, here we have pasted the code into the "End of blog post content" box so that ads are displayed at the end of each blog post:
The ad should now be displayed in your chosen location. Please note, it may take 24 hours for ads to start working on your site. Before that time, the ads may appear as blank white spaces.
Display ads within post/page content
As well as automatically displaying ads at the start/end of a post, you can also display ads within the content. For example, after a specific paragraph or image.
You might think that copying and pasting the code directly from Adsense will work, however this is not the case. WordPress will automatically remove <script> tags from your post content for security reasons. Instead of copying the ad code directly to the post content, you can use our handy [pipdig_code_1] and [pipdig_code_2] shortcodes.
1. Go to your Google Adsense account and click on the "My Ads" button:
2. Here you can access all of your ads. If you have not yet created one, click the "New ad unit" button:
3. Select "Text & display ads" from the options:
4. We recommend that you leave all of the options as defaults for best results. Simply enter a name at the top and click the "Save and get code" button:
5. Copy the code provided:
6. Go to the "pipdig > Theme Hooks" section of your WordPress dashboard:
7. Paste the ad code into the following box at the bottom of the page:

You can now place the shortcode [pipdig_code_1] anywhere within a post's text. When the post is viewed, the ad will be displayed in that position. For example:

This will display an ad in that location within the post content. Please note, it might show a blank white space for the first 24 hours whilst Google is authenticating your account settings.