The Featured Image Panels option is a great way to promote any content on your site. You can even link to external sites too, if you wanted to promote anything else.

How to enable this feature:
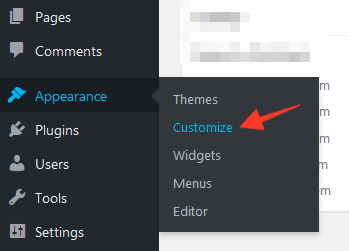
1. Go to the Appearance > Customize section of your dashboard

2. Look for the "Featured Image Panels" tab in the options along the left side of the screen:

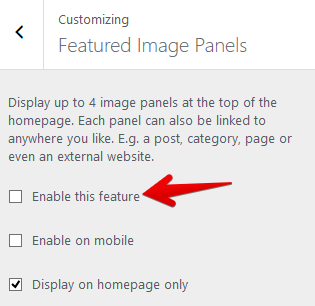
3. Enable the feature via the option shown below:

4. You can now select an image for each panel by clicking on the grey panels:

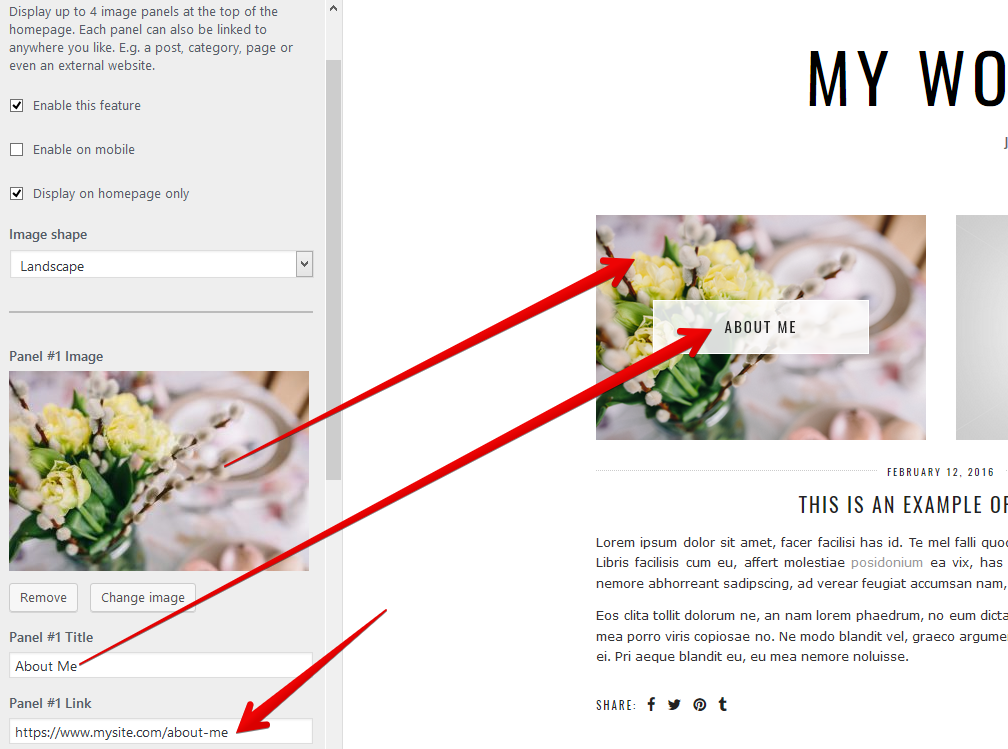
5. You can also add a "Title" and "Link" to each panel. The Title is the text which is shown over the image. The Link is where you will be taken when someone clicks on the panel. The example below shows how to create a panel for an "About Me" page:

Now let's add a link to our "Travel" post category for the second panel:

You can add a maximum of 4 panels via the options. If you remove the image from one of the panel options, it will remove the panel from showing.
I don't know where to link to!
If you are unsure how to link to a specific post/page/category, there is a quick way to retrieve this information. Simply navigate to that page, then copy the link from the top of your browser. For example, here is the link for one of the blog posts in our Blossom theme:
