All of our themes include the option to display an author bio at the bottom of each blog post. This includes your Name, Description, Profile Picture and Social Links (when using the Yoast SEO plugin).

Follow the steps below to create your author bio description and display it.
1. Setup your name, description and profile photo
Before enabling this feature, please check that Avatars are enabled in the Settings > Discussions page:
![]()
You can now setup your user profile includes any desired information. You can do this by going to the Users > Your Profile page in your dashboard

From your profile, you should edit the following options:
Display name publicly as

Select the name as you would like it to display on your posts.
Biographical Info

This is where you can add a description about the author.
Profile Picture

The profile picture in WordPress is controlled by your email address. You assign the picture to your email account via Gravatar.
Gravatar stands for Globally Recognized Avatar. When a user leaves a comment (with their email) on a site that supports Gravatar, it will also display their profile picture. For example, the comments on this site display your Gravatar.
It's completely free to create a Gravatar. Simply go to https://en.gravatar.com. Signup with the email that you use to log in to your WordPress site. Then add an avatar of yourself. The image will automatically appear on your site.
Social Media Links
If you're using the Yoast SEO plugin, you can also add your social media links which will be shown on your profile:

The Facebook link should be your Facebook profile, not a page. Not sure what the difference between a Facebook page and profile is? Check out this guide.
If you would like people to follow your Facebook profile, you can enable that option on this page.
2. Enable the Author Bio in your theme
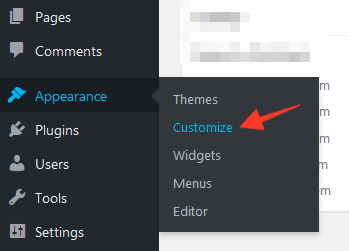
Now that your author information is set, you can now display this via the Appearance > Customize page in your dashboard.

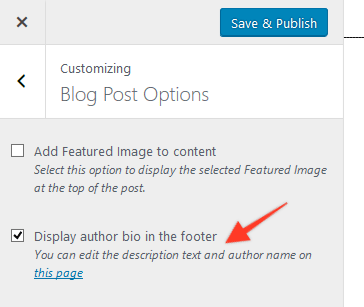
Go to the "Blog Post Options" tab:

Enable the option shown below:
