You can edit the items in your main menu by going to Appearance > Menu in your dashboard:
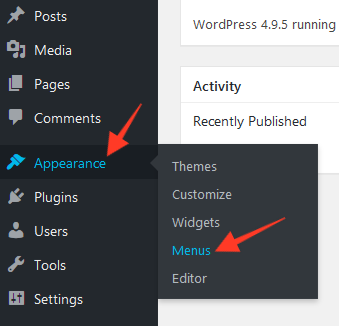
If you have not used the WordPress menu system before, you may wish to take a look at this guide, which gives a very good introduction to the features.
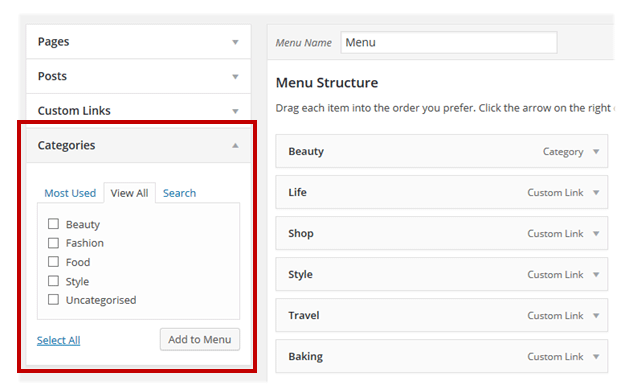
You can then add any pages, categories, links etc to your menu by using the options on the left. Please note that pages and categories will need to be created first, before they can be added to the menu. You can do this in either the Pages section of the dashboard, or the Posts > Categories section.
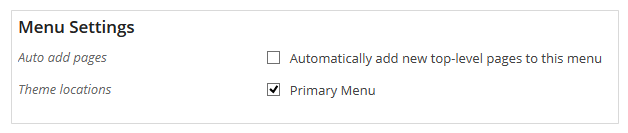
Important! After you have created your menu, you should assign it to the "Primary Menu" position:
Linking groups of posts to the menu (categories)
To display or group posts together onto a separate page, you need to use Post Categories.
First, you need to add your posts to the categories you would like to use, such as Music, Travel, Fashion etc. You can do this whilst editing any post by looking for the "Categories" section on the right of your screen:
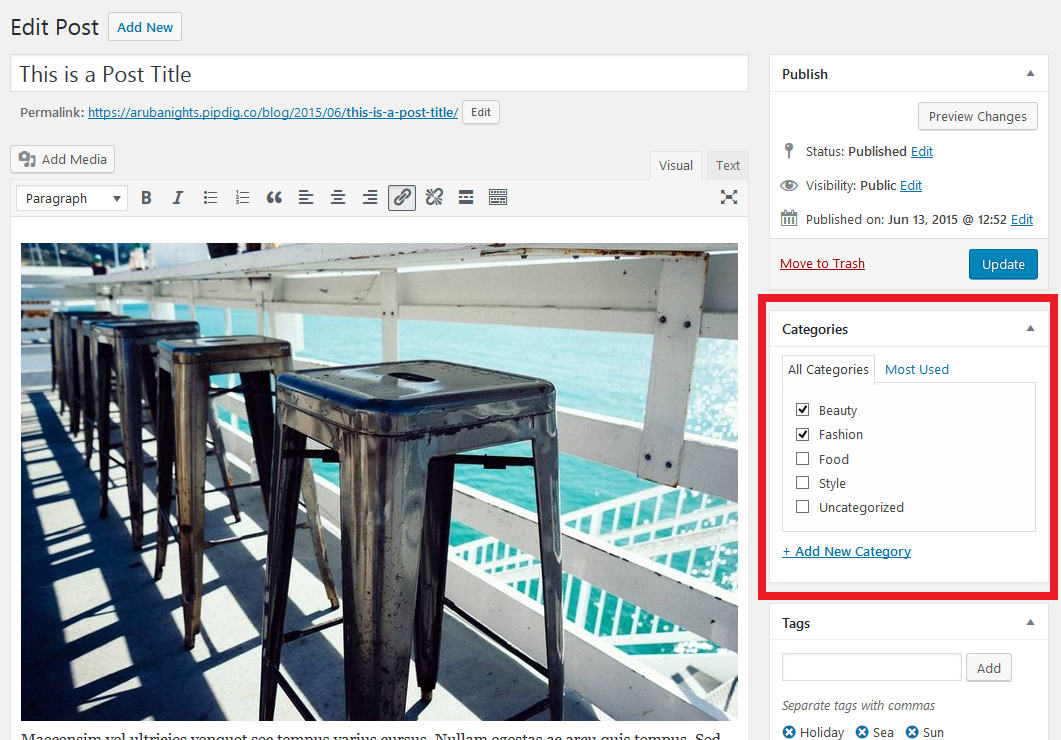
You can add a post to as many categories as you like. After you have included some posts in a category, you can then add this category to the main menu of your site. you can edit the menus by going to Appearance > Menus in your dashboard.

The video below shows a quick example of how to link your post categories to a menu. This video assumes that you have already created Post Categories with some posts in them.
Dropdown Menus
You can create dropdown menu items by dragging one menu item under another. Once positioned, click and drag the menu item so that it is slightly to the right of the item above. See this tutorial for more information on this.
Any menu items that are positioned under another like this will appear as a dropdown on your site.

What's next?
Now that your menus and pages are ready, you may want to add extra features and styling to your site via the Customizer.