NOTE: The header of your site will automatically display your site's name when not using a header image. You can change the name of your site by going to the Settings > General page in your dashboard.
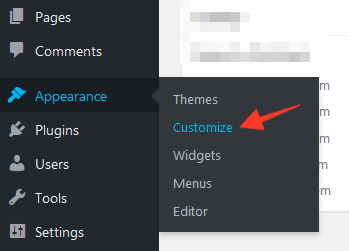
You can upload your own header image or logo from the WordPress Customizer options in Appearance > Customize
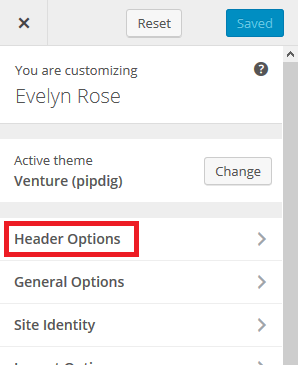
This will show the following options for uploading and displaying your image:

How do I change the spacing around the image?
You can change the margin at the top and bottom of your header image by using the options shown below:

Can I change the font?
You can change the font of the header text from the "Font Options" tab in the Customizer screen. We also have some extra font options in this guide.
What size image should I use?
The image can be any size you like. A good starting point is usually 1000x250 pixels though. If you would like the image to span the full width of the page please see the following:
Can I set the image to be the full width of the screen?
You can do this by enabling this option:

Please note that the image will only show across the full screen if it is wide enough.
Why does the image look blurry?
If you are using a device with a high resolution screen (e.g. iPad, Laptop) then you may notice that the image is blurry. To fix this, you should upload an image which double the size, then set the width using the option shown below:

For example, if you wanted to display the header image as 600 pixels wide, then you would upload an image which was 1200 pixels wide. Then set the option shown above to 600.
Article tags: logo, header, banner image, branding, space between header