Before installing the Custom Credit plugin, you will need to download the zip file from your email receipt.
How to download the plugin
When you purchase the plugin you will receive an email receipt. This includes a link to download the plugin zip file. Please check your junkmail/spam folder in case the message went there.
1. If you are using a Mac/MacBook, you should disable the "Open Safe files after downloading" option in Safari preferences.

This video shows an example of the process on a Mac:
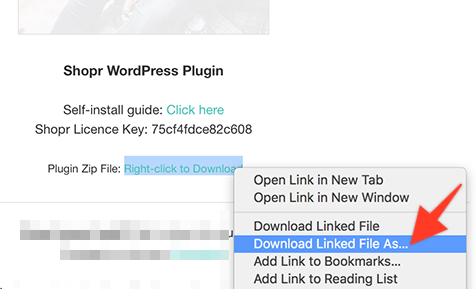
2. Download the plugin by right-clicking the link in your email receipt (or cmd-clicking on Mac). Then select “Save linked file as…”. Please note that the wording may be slightly different depending on which web browser you are using. Save the file to your desktop.

For best results, please access your emails via a web browser such as Chrome or Safari. Sometimes the download link will not work correctly when using Apple Mail or Microsoft Outlook.
Now that the file has been downloaded to your computer, we can now upload this to your WordPress site.
How to install the plugin on your site
3. Access your WordPress dashboard. Go to the Plugins > Add New page.

4. Click the Upload Plugin button at the top of the page. Then click the "Browse" button. This will allow you to select the 'pipdig-custom-credit.zip' file you downloaded during step 1.
5. Click "Activate". And you're done!

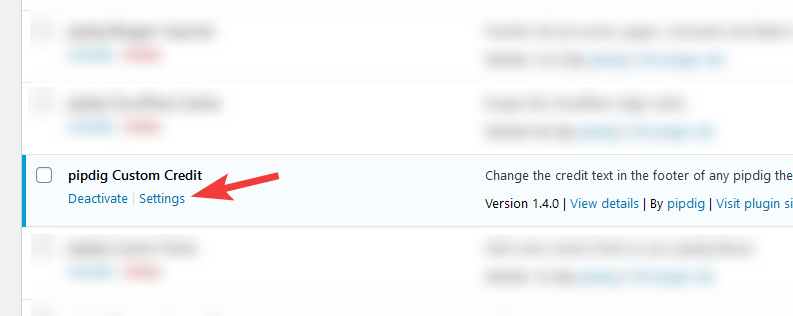
6. Scroll down to the plugin in the list, then click "Settings":

7. You can now use the new option to edit the text/HTML of the credit link:
