This guide relates to pipdig Blogger Templates. Please note that you may see different settings if you are not using our templates on your blog.
All of our templates can be updated with a custom header image. This is the image at the top of your blog, usually a logo or your blog name.
To upload a new header image, follow the steps below:
Please note, before uploading your image you may need to edit it into your desired size. You can use websites like www.picresize.com and www.resizeimage.net to do this.
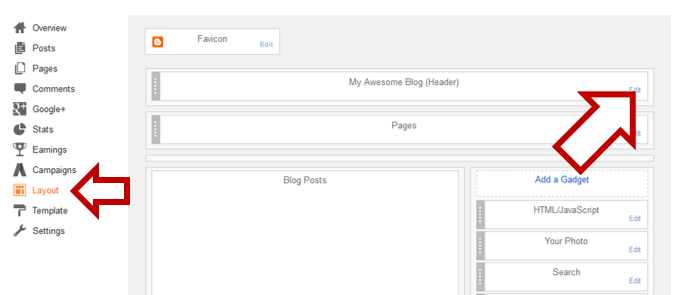
1. Go to the "Layout" section of your blog's dashboard.

2. Click the "Edit" button in the "Header" gadget, usually near the top of the layout.

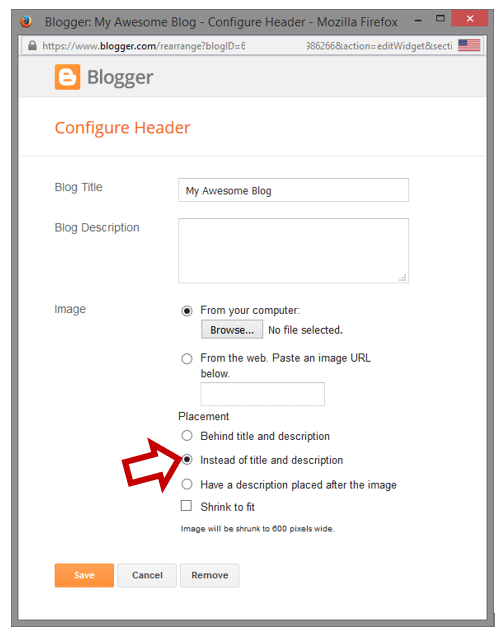
3. Make sure that you select "Instead of the title and description" and also that "Shrink to fit" is not checked.

4. Select your new header image file by using the "Browse..." button.
5. Click the "Save" button and you're done!
Image file tips
- The image you upload can be anything up to 1600 pixels wide. If it is any larger than this, Blogger will automatically crop it down to 1600.
- We recommend a width of 1000 pixels for most templates.
- The image can be any height you like, up to 1600 pixels.
- You can add/remove extra margins to the image by increasing the whitespace around the image.
- If you would like to use a transparent background on your image, you should save the image as a PNG rather than JPEG.